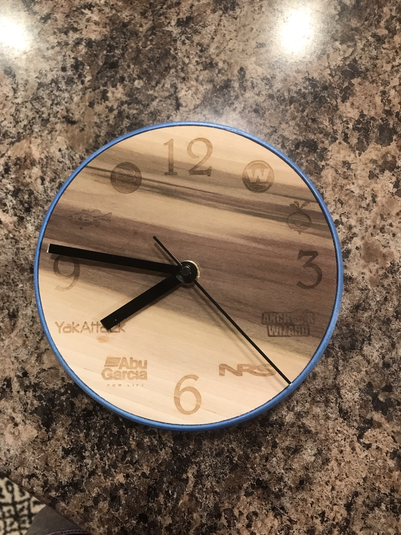
A Personalized Clock
As a class, wew were tasked with designing a clock using three different machines in the shop. I chose to use the CNC to cut my wood, Laser to make a design on it, and the 3D printer to make a base for the clock.
3D Printed Clock Base
|
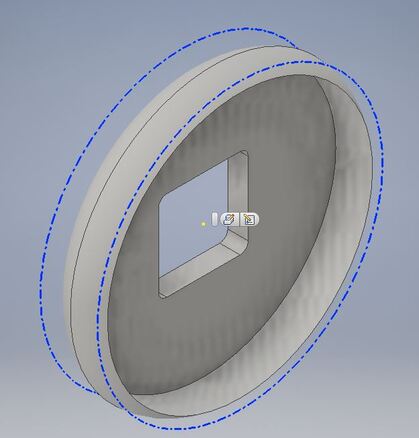
I began by designing my clock base file in inventor. To begin, I created a circle tjhat was 7 inches in diameter and extruded it 1". Then I made a smaller circle that was 6.5 inches inside that circle and used the extrude cut tool and cut it into it ,75 inches. |
|
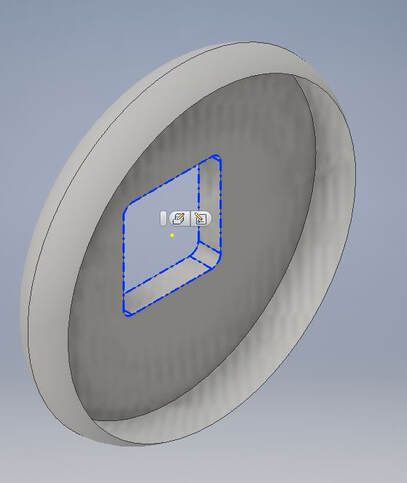
After my circle was created, I created another rectangle hole in it with hopes that my design for my clock part would fit there. then I was set in inventor. |
|
|
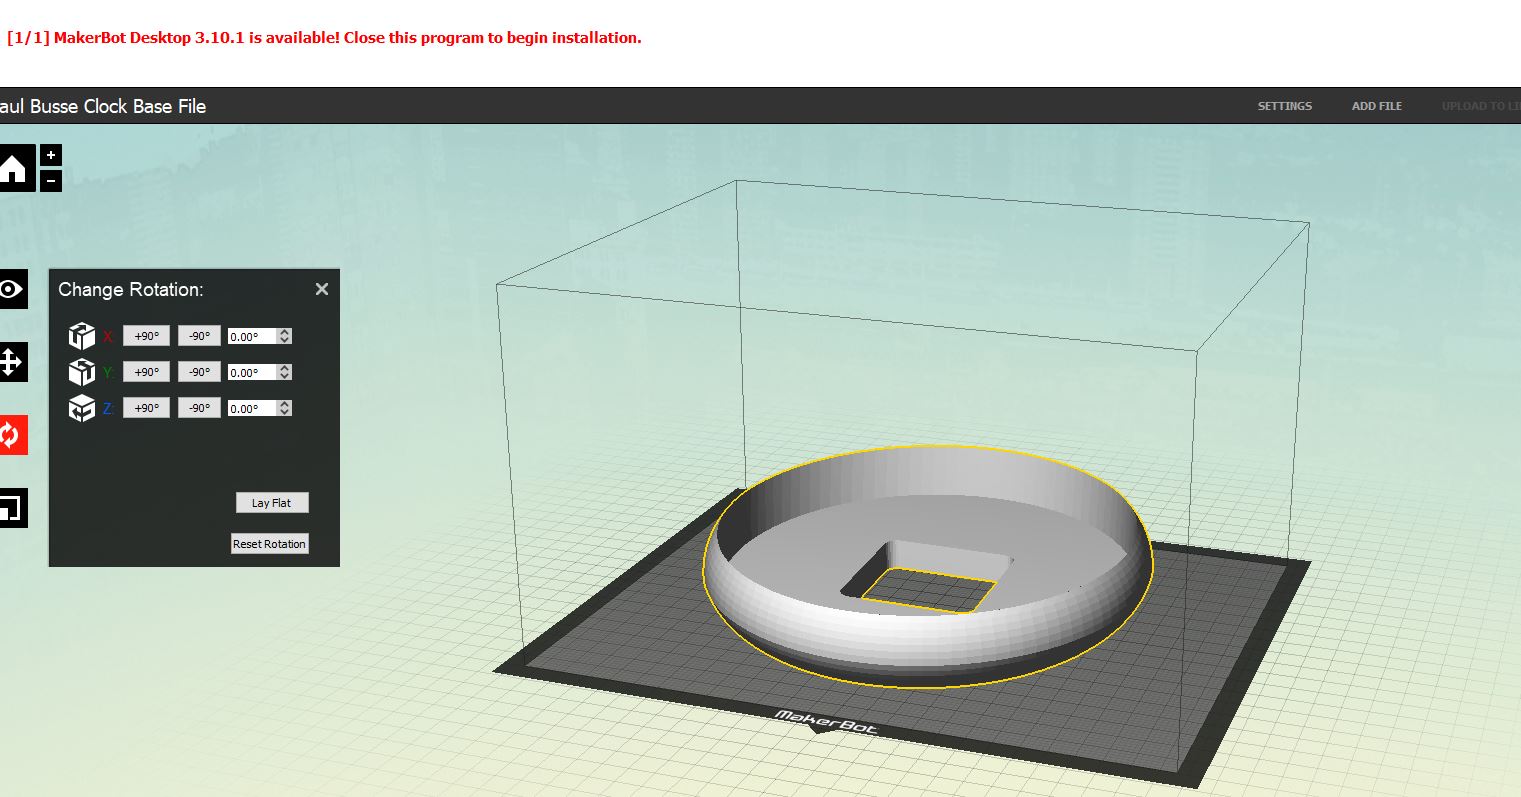
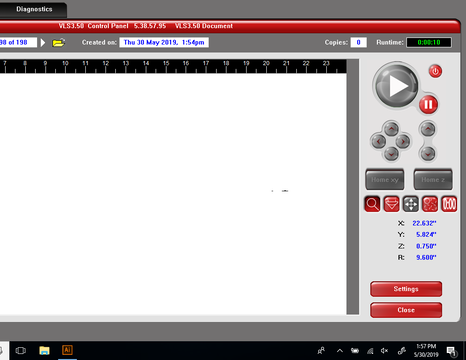
Next, I openened makerbot and clicked on open file. I then selected my clock base file. Once it was in, I adjusted it by clicking different rotation buttons before finaly clicking "lay flat". Then I went into scale, and changed my units to inches. It is important that you double check the conversion so that everything is printed completely and correctley. The final step was to change scale from 100% to 1000%. |
|
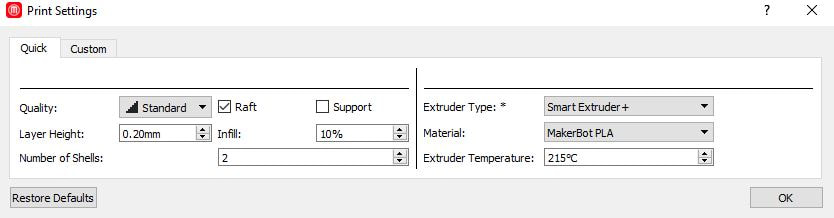
Then I went to the export print file tab and began to edit settings there. I made sure that it was "Smart Extruder +" and set to 215°C. Then I turned on rafts and turned off supports. I then went to print preview and made sure everything looked ok. I then went ahead and clicked ok and put it on my flash drive.
|
|
|
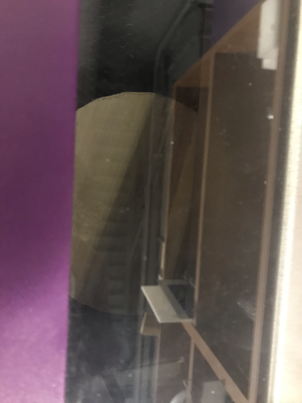
Once I was at a printer, I found my file and clicked print! I sat with it until the raft was prtinted. The first attempt didn't print a raft so I re did it, and it printed it the second time just fine. |
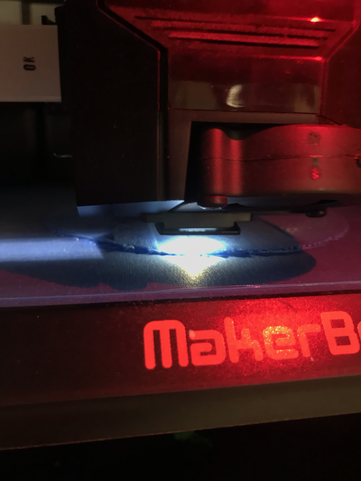
Laser Engraved Design
|
I began by creating a new file on illustrator and created a circle that was 6.5 inches in diameter so that I can make sure that everything fit. |
Next, I uploaded my images and numbers. I then selected them and right clicked them. I then clicked "create outlines" and changed it to black in .0001 diameter. Then I headed to the laser and opened my file.
|
Once I opened it on the computer, I selected my material settings and made sure that everything was aligned. |
|
After triple checking my settings one last time, I clicked print and began engraving my image. |
|
CNC Clock
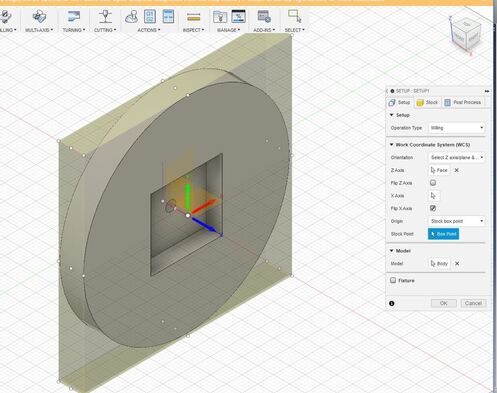
For my third machine, I chose the CNC Router. I used the router to cut out the wood that I would Engrave my images onto. I began by setting up a degign sketch in Inventor. I made it the shape of the wood that I wanted and then sent it over to fusion.
|
Once in fusion, I began setting up my settings. I made sure that I nad my X, Y, and Z set correct. It took a few seconds, But I got it to cooperate with me. |
|
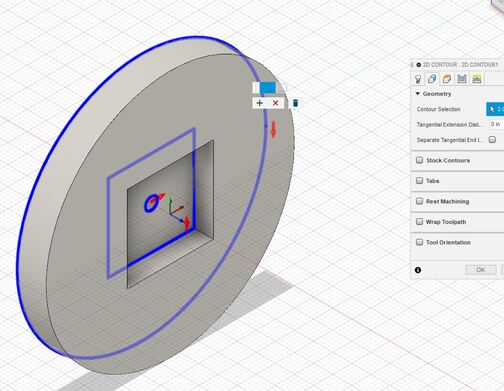
Then, I went into the stock tab and changed it to a fixed size box. Under the height tab, i changed it to "Offset from bottom", 0. Then I began setting up the actual tool path for the machine to follow. I had to create a 2d contour so that the machine cut the circle out, and then in the rectangle in the middle, I had to create a 3d adaptive clearing so that It cut it out. We left the hoole filled in, and we drilled it later at home. |
|
|
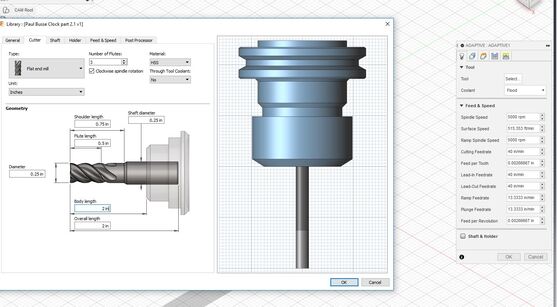
Then I clicked on "tool". I then went into the settings and changed the type to flat end mill, then the diameter to .25 and the overall body length to 2 inches. Then changed the speed and feed settings to 12000 RPM for wooed, after a little research on what that should be set at :). Next, I went to the passes tab and changed my max rough step to .25", stock to leave : 0, and waited a sec while it was uploading. I then saved it, and headed to the innovation center.
|

|
Once down ther4e, I placed my wood in the clamps. These had to be adjusted each run so that the circle wouldnt fly out. I then put a screw through my stock box point and went over and aligned my router. once aligned, I seroed X and Y, and then sensed Z. Once I was all set, I began step one, cutting out the circle. Once the circle was cut out, we removed the screws and adjusted the brackeets again so that I could cut out the iundent for the clock part. This took a bit longer than expected because we had to move some things around. Also, my file for the clock was off a bit so I had to quickly go change that. After that, it was smooth sailing.
After I cut it out on the router, I had to use a band saw and sander to shape the edges, as the router didn't cut all the way through for some reason. I then put it in my backpack and took it home to assemble. At home, I removed the raft from the 3D print, sanded a bit more, and put a layer of Gun Oil on it to make the engravings pop. I then put it all together and it turned out awesome!
BOOM!!
Summary
This was a tough one. Flat out. We had a lot to do in a short time, So it was very very stressful. I had to use contact times and lunches to stay caught up, but in the end I was able to get it done. Im ery pleased with how it turned out. I was able to use three different machines in the shop successfully, plus an additional two in the woods shop to finalize it. I leanred a lot. I learned that time management is key when it comes to this project. I also learned that in order to save yourself some time, You should do a 2D contour on the outside of the clock because it shaved off 15 valuable minutes.
I suppose because this is my last part to this webpage, I should do a reflection on the class as well. Overall, I loved it. I loved that we constantly had projects to work on, and there was never a dull moment. From peoples projects catching on fire, to successfully completing a semester project in 3 days, from the ground up, It was an epic roller coaster ride. But had I not had the help from the teachers, I might have still been stuck on widget 4 in the Inventor Unit. It was awesome that I could have them for help if I ever needed it.
I suppose because this is my last part to this webpage, I should do a reflection on the class as well. Overall, I loved it. I loved that we constantly had projects to work on, and there was never a dull moment. From peoples projects catching on fire, to successfully completing a semester project in 3 days, from the ground up, It was an epic roller coaster ride. But had I not had the help from the teachers, I might have still been stuck on widget 4 in the Inventor Unit. It was awesome that I could have them for help if I ever needed it.
