Personalized Maze
We were tasked with designing a maze and cutting it out n the CNC Router. At first, This seemed like an easy task, but it wasn't long before I began to struggle with the design proscess.
I wanted a maze that was a simple design because of how chal;lenging it was to create in inventor. I ended up going with a simple rectangle maze, which would allow me to use more space than say a circle or square. We had to make the paths 5/16" wide and have a 3/8" border around the entire maze. Above is a picture of my design in my engineering notebook.
I wanted a maze that was a simple design because of how chal;lenging it was to create in inventor. I ended up going with a simple rectangle maze, which would allow me to use more space than say a circle or square. We had to make the paths 5/16" wide and have a 3/8" border around the entire maze. Above is a picture of my design in my engineering notebook.
Design
|
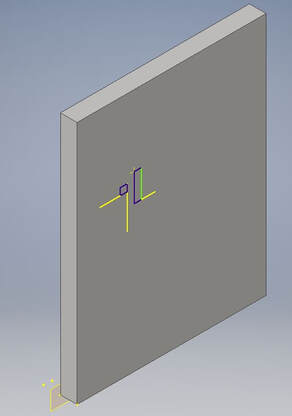
I began my design in inventor by creating a rough sketch of a rectangle. After I demensioned it appropriatley, I extruded it 3/4", which is the material thickness. |
|
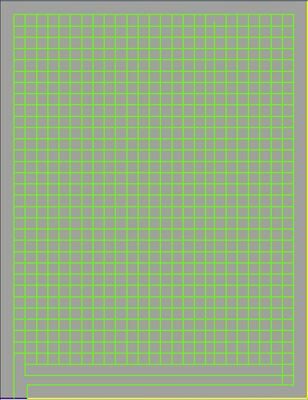
Now came the hard par. Designing the paths of the maze. I started out just drawing a general shape of the maze, but I kept getting twisted around so I decided to go another route. After doing some research on previous years, I went the way of designing a grid to go over my rectangle and then used the trim tool to create my path. |
|
|
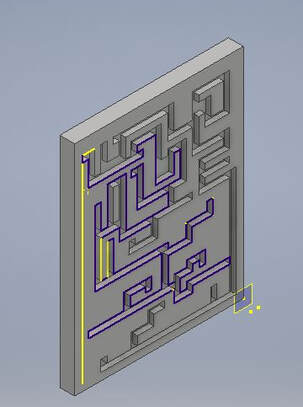
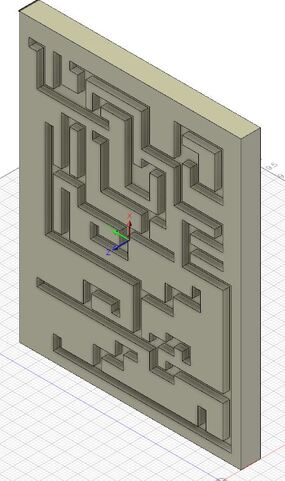
After my paths were trimmed out, I began extruding. I extruded them 1/4". When I extruded, however, there were some extrusions that shouldn't have been there. To fix this, I created a new sketch and filled it in using the extrusion tool in reverse. When I was finished, My maze looked something like this. |
Fusion 360
|
After my design was finished in Inventor, it was time to put it into the software that speaks the same language as the router and the mill. This program was Fusion 360. Once I got it into fusion, the first thing I did was set up the orentation of my maze. To do this, I used the set up tab and aligned my x, y, and z axis appropriatley. It looked something like this. |
|
|
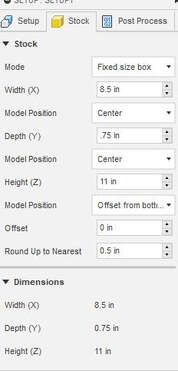
Next, I set up the stock. The stock is the material that we use in your project. In this case, it was foam. My project was 8.5"x11". The final step in this proscess was setting the offset to 0. |
|
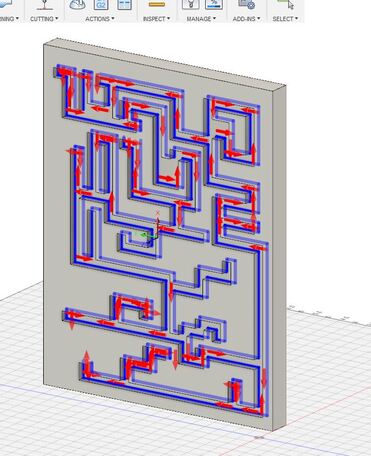
Next, I had to select the route that the drill would travel. To do this, I went to the contour setup tab. Next, I manually selected each line in my maze and told the drill the way to go. After they are selected, they should appear blue with a red arrow indicating direction off of it. |
|
|
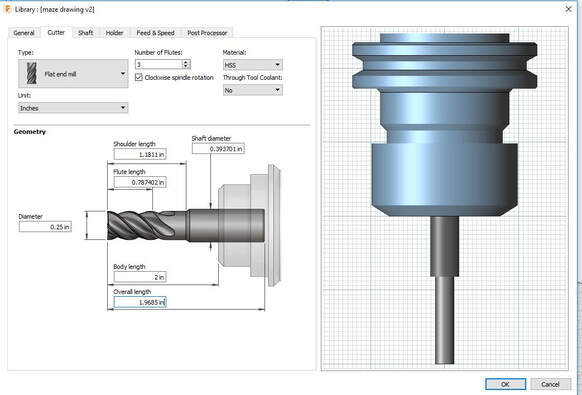
Next, I had to setup the tool settings. I had to select the correcr size drill bit for the job, as well as correct size. I clicked on the 2D tab and began to setup the tools path. For this project, we would use a flat end mill but that was .25" diameter, and 2" body length. Once the tool was set, I changed the spindle speed to 10000 rpm, the max rough step down to .25", and the stock to leave to 0. |
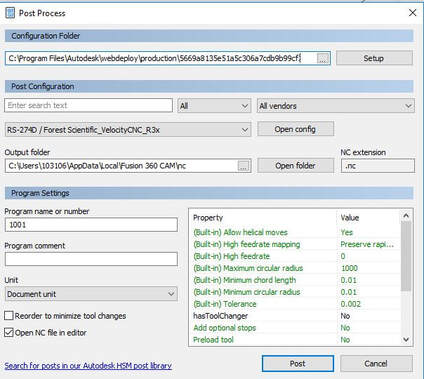
Once everything looked good, and after I ran the simulation pass a couple times, I exported it in g code format under the forrest scientific configuration for the router. Then I saved it to the flashdrive and headed to the innovation center.
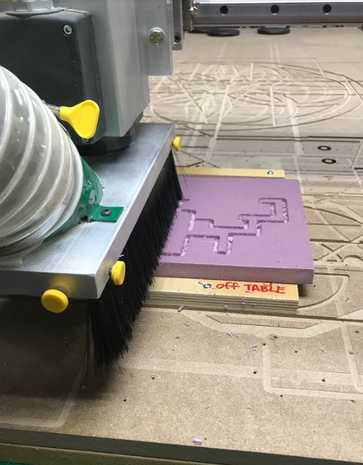
Router!!
|
I began by grabbing my foam material and making a black dot in the middle of it. I then headed to the router and applied double sided tape to it so it didn't fly out. I then centered the drill over the dot by using the jogging command. I zeroed the X and Y at this point. Then I used the Z zero tool and set the 0 to .600 because thats how long the sensor is. Once everything was set, I hit the run button and held my hand over the space bar just encase anything would happen and I would need to stop it. |
|

|
|
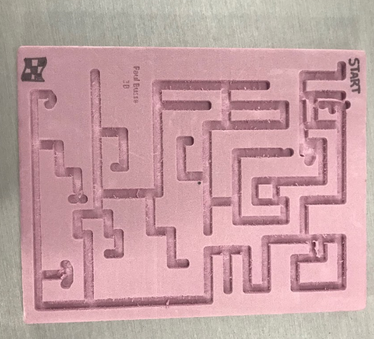
Final Product!!!
|
|
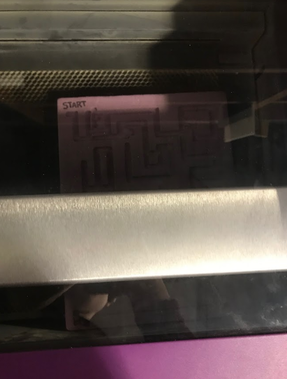
After I was set with the maze, I ended up laser engraving it. To do that, I went into illustrator and typed my name and hour. I thencreated outlines in RGB blue so that the laser knew t0o engrave it. I then lined it up and positioned tha laser. I then pressed play, and watched as It printed my name onto the foam.
Summary
This was definitely a unit where I learned the most. I learned how to use Fusion 360 to turn an Inventor file into one compatible with both the CNC Router and CNC Mill. I also learned that Fusion 360 is very difficult to use. You have to change many, many settings to convert your file to G-Code and setup the drill bit correctly. The skills I learned in this rotation will certainly come in handy for when I use the CNC Mill to make my brake part. The simulate tool in Fusion is very useful to see how the drill will actually work on your project.
I also learned valuable problem solving skills in this unit. Designing my maze was probably the most challenging experience that I've had this far in IDEA class. I eventually figured it out by using the trim tool and many squares. With the help of Mrs. Proctor, I overcame all the problems I faced and my maze turned out great!
I also learned valuable problem solving skills in this unit. Designing my maze was probably the most challenging experience that I've had this far in IDEA class. I eventually figured it out by using the trim tool and many squares. With the help of Mrs. Proctor, I overcame all the problems I faced and my maze turned out great!
