Custom 3D Printed Toothbrush Holder
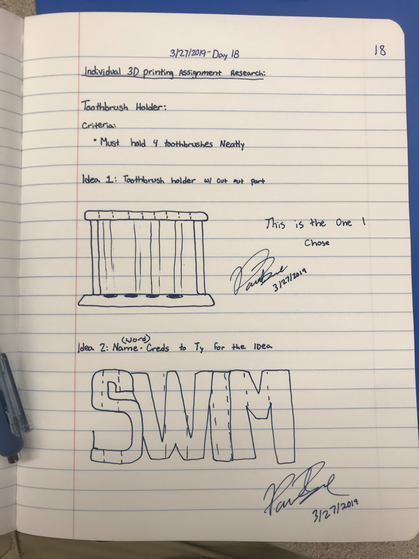
In order to successfully complete the toothbrush holder project, you have top complete a little bit of Research and Design (R&D). Here is a photo of my engineering notebook where I researched things like the dimension that the holes for the holder should be, maximum length, width and height, and finally design the final product. I drew two options to choose from, and ultimately decided to go with option one.
|
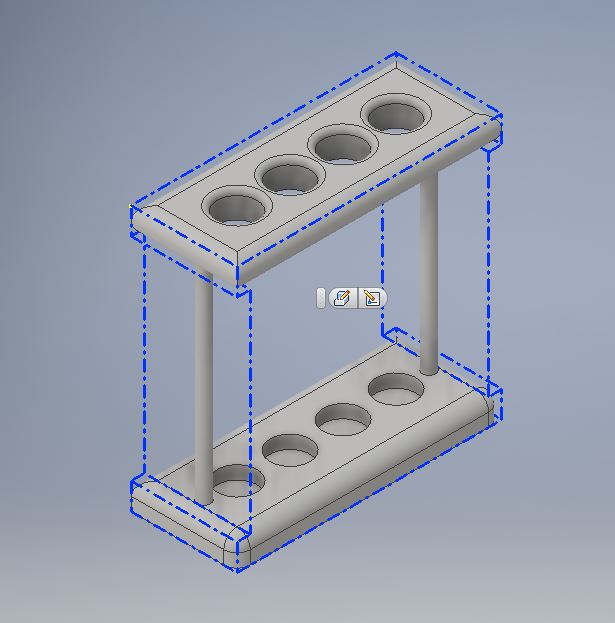
First, I created a part file in Inventor. I then clicked "start 2D sketch" then selected the xy plane. The first thing I drew was asquare that was 5 inches by 5 inches. Then I clicked finish sketch and then extruded it 2 inches back. (Shown in blue dotted lines). Then, once extruded, I began another 2D sketch on the left side view to create a rectangle that was 2 inches by 4 inches tall. (Pictured on right). To cut this portion out, instead of extruding inward, I extruded twards the project and It ga ve the project an inward cut. I repeated this step on the other side to give it a symmetrical view.
|
|
|
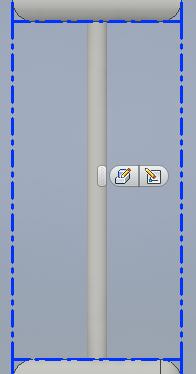
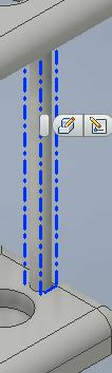
Next, I created the posts to support the "upper deck" of the toothbrush holder. To do this, I created another 2D sketch on the part that I cut out and made it so that it cut until there was a rectangle like the one highlighted in blue pictured at the right. Then, to make it have a cleaner look, I used the fillet tool to round the edges to make it a cylinder. I repeated this again on the other side as well. |
|

|
|
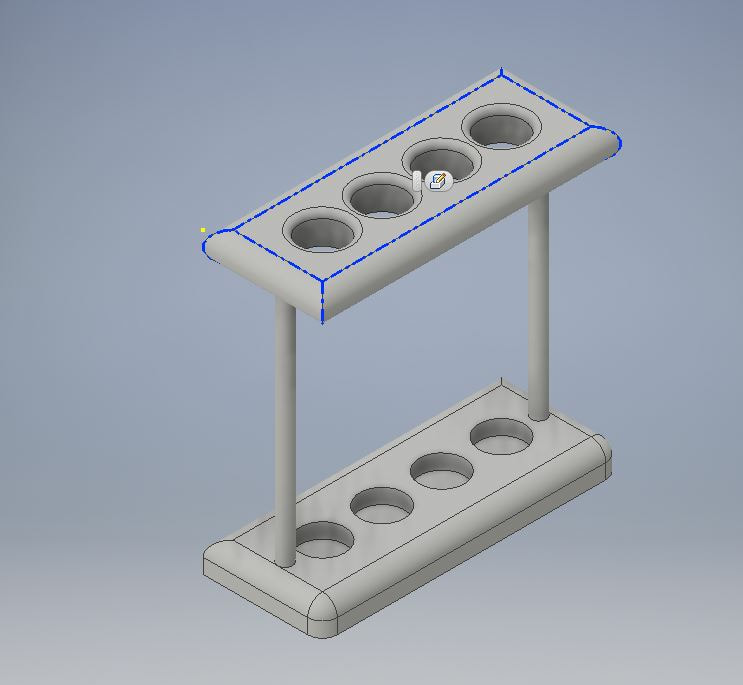
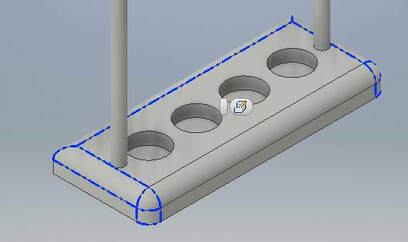
Then, I began filliting the top and bottom decks of the toothbrush holder to give it a nice smooth modern look. To do this, I selected the lines from the top that I wanted to round, as well as the bottom. (Pictured on left highlighted in blue line). Then I clicked fillet to .5" to give it a rounder appearance and it looked something like the picture on the right. |
|
|
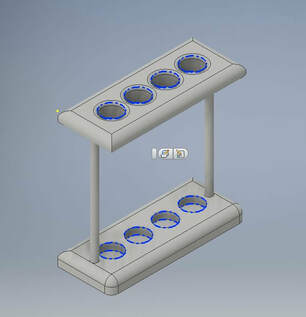
At this point, you are almost done with the design part. All the holder needed was holes. I first tried using the hole tool in inventor, but it was hard to pinpoint the correct place for them. So instead, Mrs. Proctor reccomended that I use the curcle tool and extrude it downwards. This one worked the best. I Made my holes .75" in diameter and extruded them downwards 4.75". I did 4.75 inched because I wanted a .25" hole in the bottom for the bottom of the toothbrush to sit in. Then, I filleted the top holes and I was all set with my design!! Now on to printing!
|
|

|
3D Printing the Toothbrush Holder
|
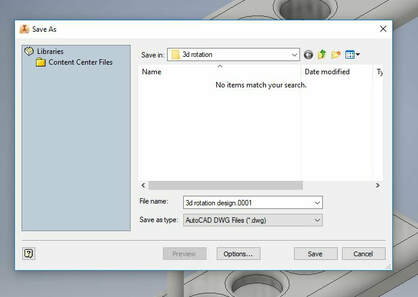
Before you open makerbot, you have to export and save your file as an .STL which is compatible with the 3D printer. Then, I opened MakerBot and clicked add file. Then my project appeared in the box on the left side of the screen. |
|

|
Next, I changed the scaling to 1000% so that it would print to the appropriate size. Then I rotated the object 90 degrees in each direction so that it layed flat on its side. This makes it so that It uses the least amount of supports as possible. Finally, I clicked "lay flat". |
|
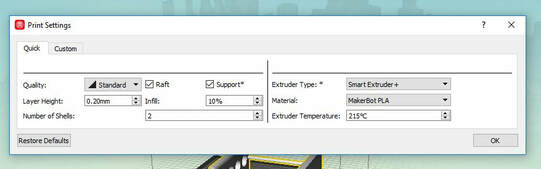
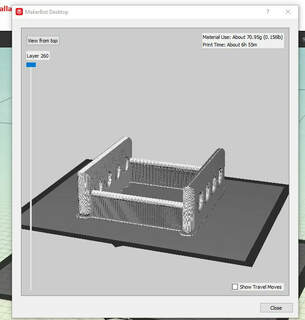
I modified the print settings so that there was a raft, and checked the support box because this project would need them. I made sure that the extruder temp was 215°C and that the extruder type was "Smart Extruder +" and clicked ok. Then I clicked Print-Print Preview and the window pictured on the far right appeared. |
|
|
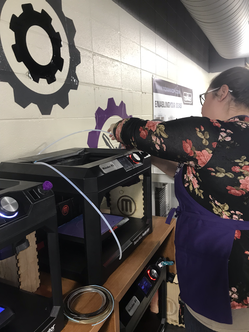
After I saved it to my flash drive, I went to the innovation center and put the USB into the printer and selected my file. I wanted another color of fillament, so Mrs. Proctor helped me change that as well. |
|
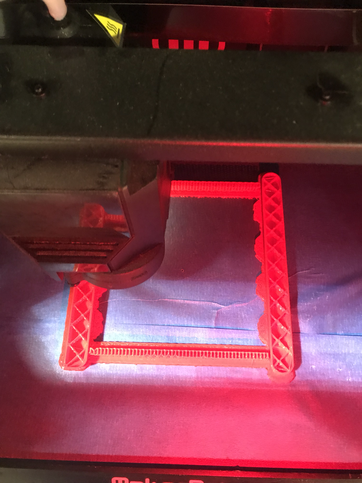
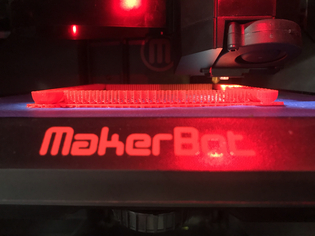
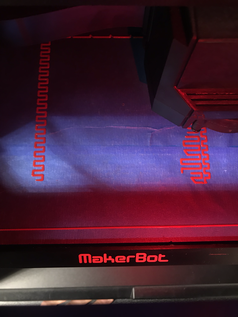
After the machine was all set up, I clicked print and waited foir it to print the bottom raft before I left. My first attempt, something happened to the printer and it stopped printing. This is pictured to the right in Blue. I then tried again the class after that and was successfull in printing a toothbrush holder in red.
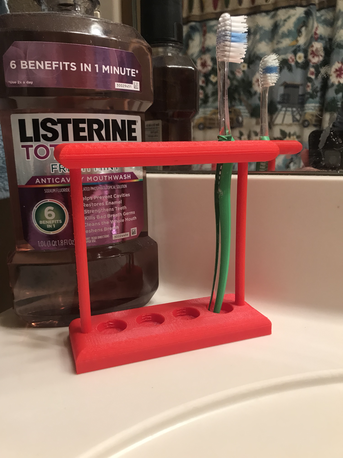
When it was fininshed, I had to remove alll of the supports, as you can see at the right. I used a pliers and pulled them off. It then was a functionable toothbrush holder. |
To the left is some pictures of the product printing. It too about 7 hours to complete. I ended up picking up the project and taking it to study hall to clean it up a bit.
|

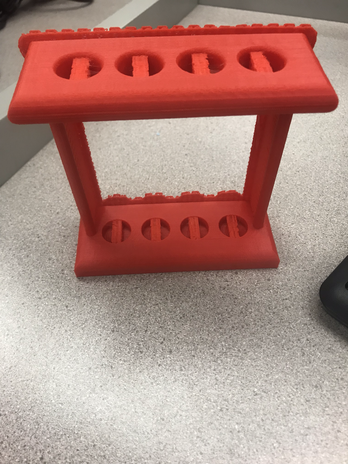

The Final Product!!!
|
|
Summary
This rotation was a big success for me. I learned a lot more about the 3D printing proscess, as well as about inventor. I learned how to use the hole tool to create my holes that the toothbrushes will sit in. I also learned how to use the fillet tool, which I think is a very cool tool to use because it makes everything look cleaner and have a finished look. This rotation also tested my skills on the 3D printer that I had learned from the previous projects. Also, Mrs. Proctor taught me how to reload fillament, and now I can confidently do it on my own.
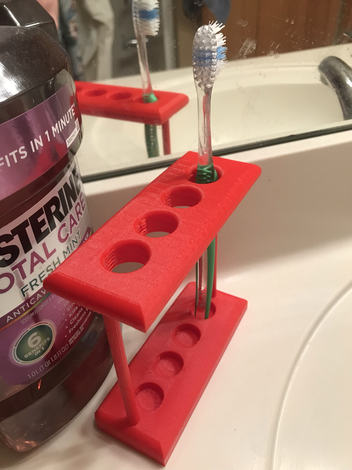
This project also refreshed me on the design proscess. It brought back things that I learned in 9th grade in Intro To Industrial Tech Class with Mr. Schumacher. THe first step is to ID the problem. The problem in this case was to design a toothbrush holder that can hold 4 toothbrushes. I wanted a design that would be sanitary and organized. After lots of research, My solution was to create a toothbrush holder that had all of the toothbrush heads facing upwards and out of the water so that they can dry. Next, I designed it, and constructed a prototype. It worked well, and I can now make some more and improve the things that didn't go as planned on this one in my free time. Some changes that I would make is to make the supports stronger because they are very flexible and that isn't good sometimes because I don't want it to break. All in all, it was a successfull rotation, and I earned that it is a lot of work to 3D print something correctly and in the end, It can be very rewarding!!
This project also refreshed me on the design proscess. It brought back things that I learned in 9th grade in Intro To Industrial Tech Class with Mr. Schumacher. THe first step is to ID the problem. The problem in this case was to design a toothbrush holder that can hold 4 toothbrushes. I wanted a design that would be sanitary and organized. After lots of research, My solution was to create a toothbrush holder that had all of the toothbrush heads facing upwards and out of the water so that they can dry. Next, I designed it, and constructed a prototype. It worked well, and I can now make some more and improve the things that didn't go as planned on this one in my free time. Some changes that I would make is to make the supports stronger because they are very flexible and that isn't good sometimes because I don't want it to break. All in all, it was a successfull rotation, and I earned that it is a lot of work to 3D print something correctly and in the end, It can be very rewarding!!
